
This blog uses my free Swim & Gym bag sewing pattern
Hi lovelies,
By now the secret is out, I've designed a Swim & Gym bag for August's bag of the month club!
So I thought I'd put together a little tutorial on how to insert eyelets into the top band, as they can scare people! It seems every pattern I put out I have to add 'Do not fear the...' Last year it was the tubular frame, this year it was the oval handles, and this season it's eyelets!
Apparently I like scary hardware?
Well...like all of the other things to fear, do not fear the eyelets, I'll hold your hand! (But not the hand you need to hold the hammer, you'll need that)
First off you'll need to mark the position of your eyelets. It should tell you in the pattern where to position them, but if it doesn't, divide the top of the bag by the number of eyelets you want to position. Use that number as your measurement from centre of eyelet to centre of eyelet. It's not usually an exact number, so even them out the best you can.

I use the eyelet itself to draw my mark on the band. Then it's time to make the holes! If you have small sharp scissors, these will come in handy. I have a punch set which is ok, but struggles through things like Cordura (aka tough duck) and faux leather.
If you're going to use a punch set, make sure that you are working on a solid, stable surface with no vibrations. I use my scullery floor usually! You simply put the punch in place, then using a few taps of the hammer (fairly confidently despite the risk of bruised thumbs) it should start to cut the hole. Some eyelet packs come with hole punches inside!

Once you've cut your hole, snip any strays away so that the hole is nice and clear.

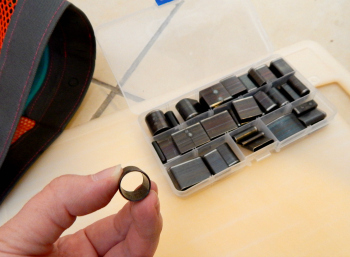
So now we're ready to eyelet, I thought I'd better show you what's in my pack. This is a pack from Prym and comes with the blue setter, the silver solid anvil (centre) and two eyelet pieces. One has a sort of sticky up bit, the other is flat like a washer.

I'll show you how they go without the fabric first. The male bit sits on top of the anvil like so. Then you would slot your fabric over the sticky up bit and make sure it was pressed down nicely.

The washers I have are slightly different on each side, so check your packet. It should show you which side should be placed facing up. In my case, the solid side should be facing up as shown.

You would pop the washer on top, then insert the tool into the top of the male part as pictured below. The washer would be nearer the top of the male part due to fabric thickness between the eyelet parts.

So that's what we'll do now. Male eyelet part on top of the anvil, then fabric, then washer. I've made sure that the washer is facing into the bag, so that the prettier side is on the outside of the bag.

Once you're happy the eyelet is sat nicely on the anvil below, place the tool onto the male part of the eyelet and using a hammer, give a few good sharp taps onto the metal part of the tool. This will cause the male part to open out, and sort of roll out holding the washer in place.

This is what it should look like when the eyelet is properly fixed in place.
You can see there's an inner ring of metal, then an outer ring. The outer ring is the eyelet which we placed on top, and the inner ring is the male eyelet underneath sort of smooshed out, over the top of the washer to hold it in place.

This is what it looks like on the outside of the bag once it's fixed into place.

If you buy eyelets in a kit, you'll usually get the tool to go with them. If you buy them individually, you'll usually need to buy the setter and anvil separately. If you're going to use eyelets a lot in your bag making, it may be worth investing in a press, with different size setters. They're not cheap though, so make sure you're going to use it!
I hope you've found my tutorial helpful! You can see more about the Swim & Gym bag on my blog this month, or visit the facebook page for more help.
