
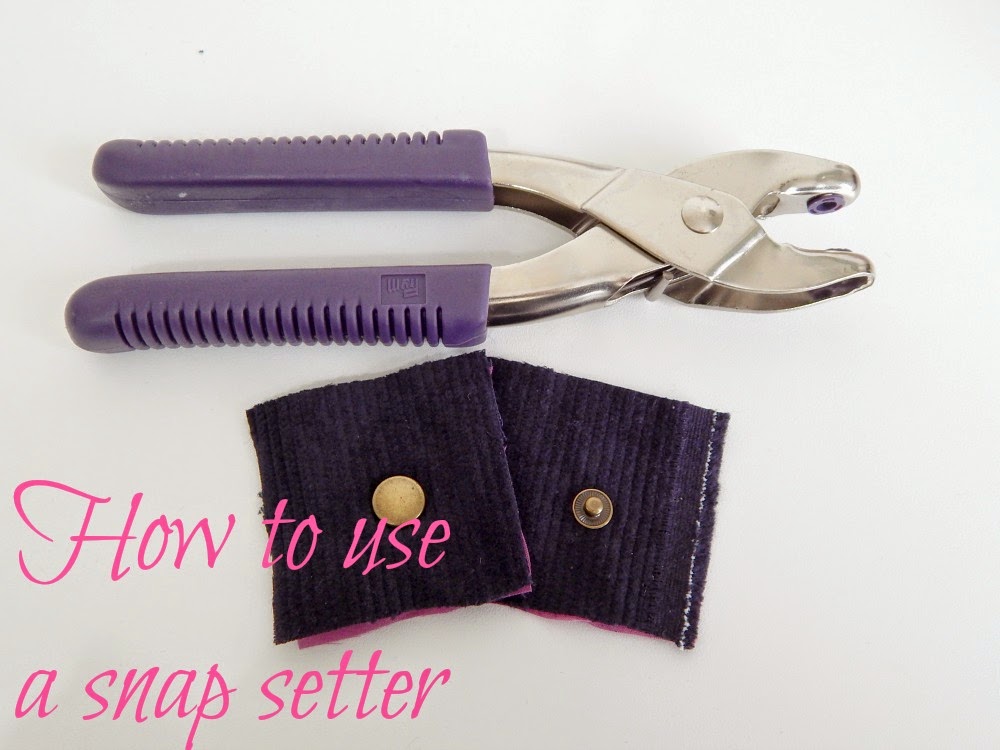
I saw this Prym Vario Poppa Pliers tool on the great British sewing bee (dungarees task) but I've always used the freebie tool and hammer to set my snaps in the past so it intrigued me. When Minerva crafts offered me the chance to review this setter myself I jumped on them!
Firstly, let me say this, whenever I've used the freebie tool & a hammer I always end up with puckers in my fabric, it's never very secure and it's a whole lot of hassle. I had high hopes for this tool and it didn't disappoint!
I thought I'd photograph the steps so you could see how easy it is to use.
The tool comes with the relevant 'bits' to fit snaps, but if you buy a pack of Prym snaps it will come with size specific fitting 'bits' which you can use in your Prym snap setter.
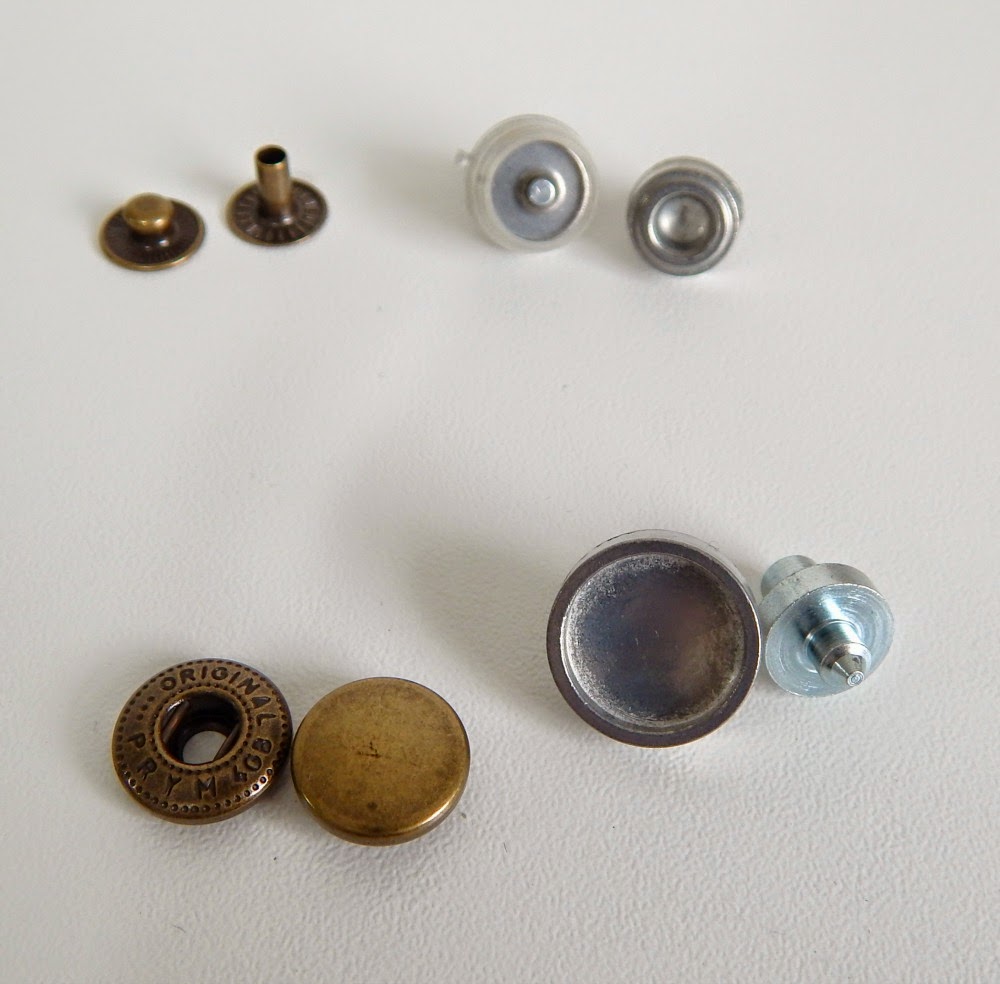
You'll need four snap parts, I've put the male parts and their 'bits' together at the back and female at the front.

The setting 'bits' (anyone know what they're called?) fit into the holes in the snap setter like so. They're inter-changeable so you can choose which way is easiest for you. I found it easiest to put the smooth snap side down and the prong-y bit on the top. The only downside to this setter was that the bits do tend to fall out if you're not careful. I suspect it would be the same for all setters but it can be a bit tricky to not let them fall out just as you're trying to use it!
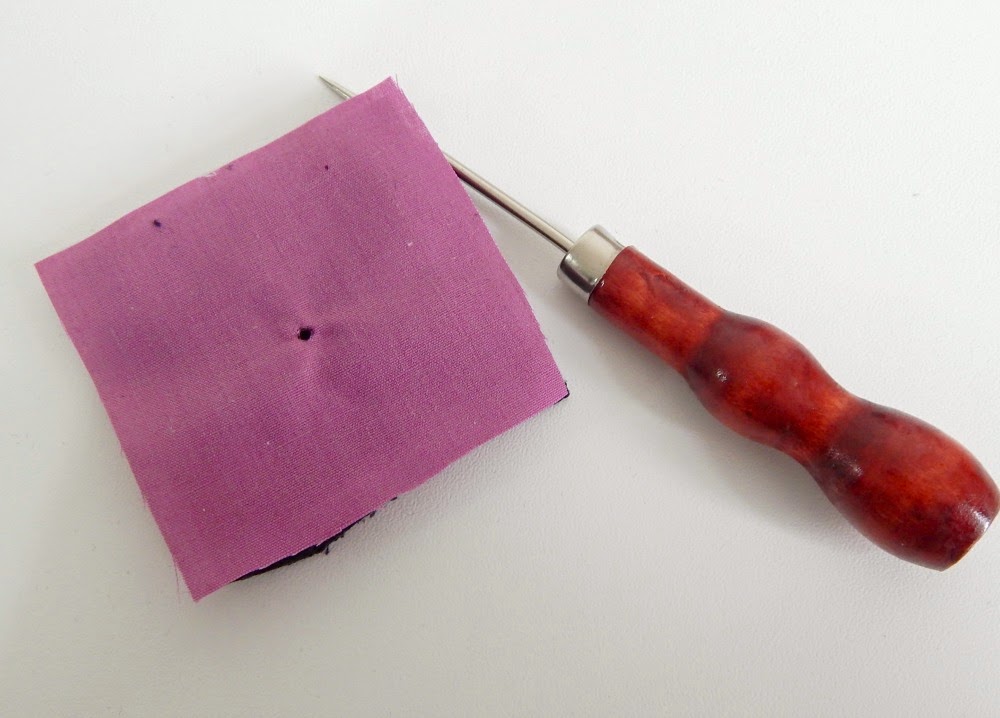
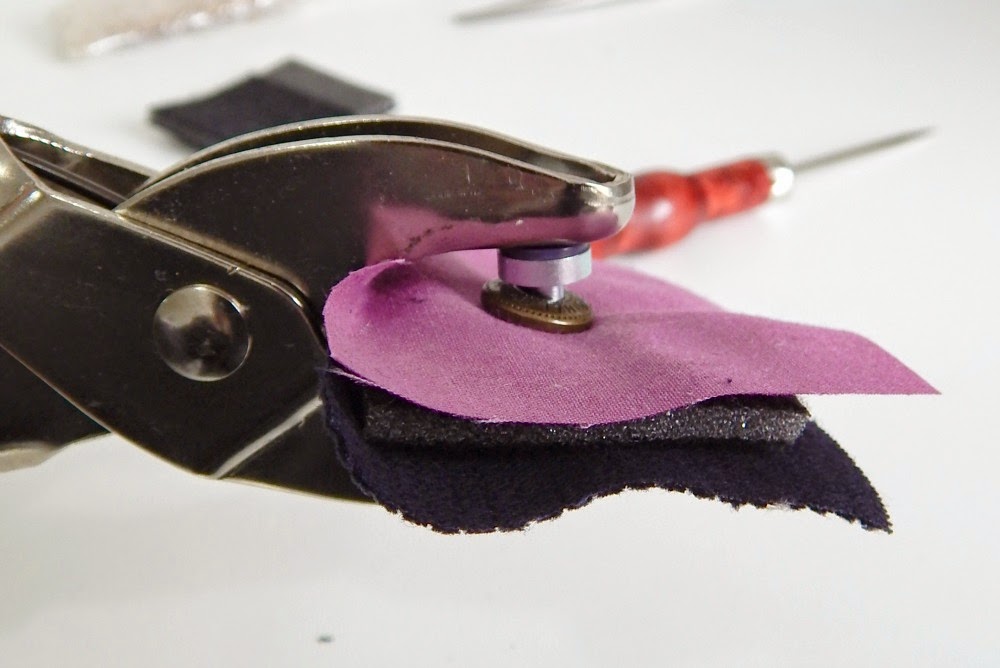
I used an awl to pierce a hole in my fabrics. I wanted to experiment so I used my outer fabric, a lining fabric and some soft & stable on my female snap and omitted the soft & stable on my male snap.

I found the easiest way to line the female snap part up was to thread on the lining side snap piece, then each piece of fabric and finally pop the awl spike into the female snap piece. (Easier shown in the following photos)
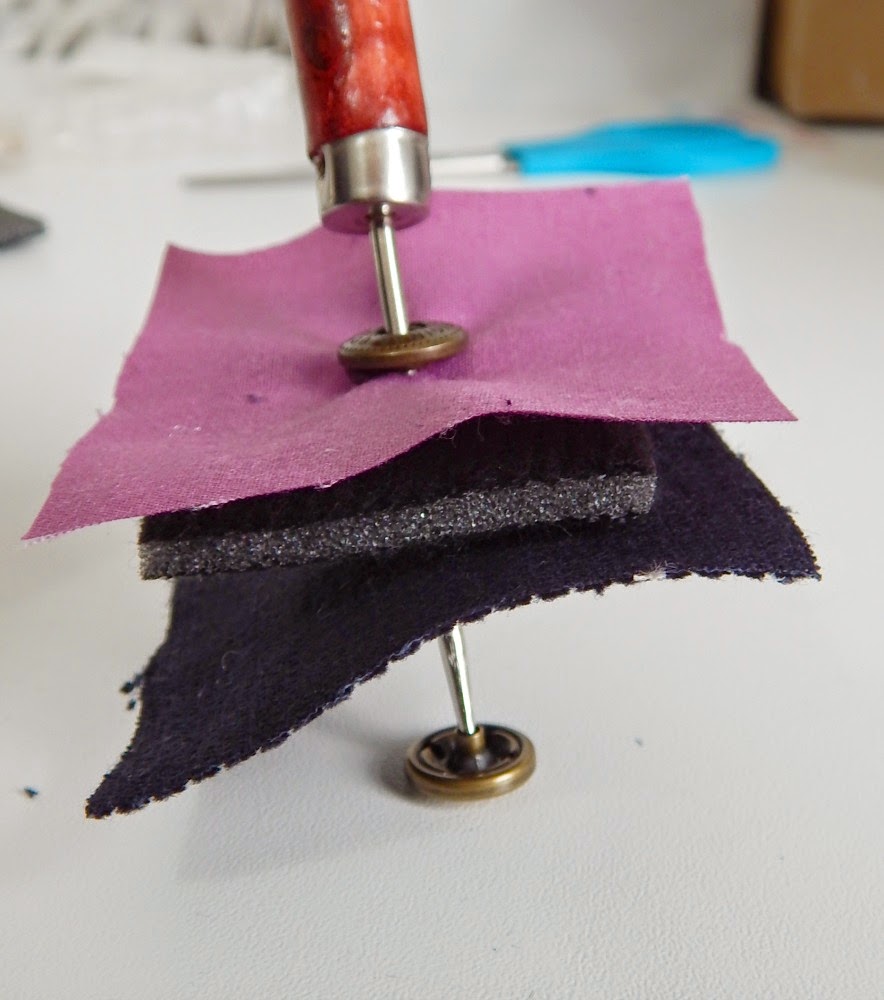
Once I had them lined up I popped them into my snap setter and pressed down until I felt a sort of 'click'.
Watching the great British sewing bee contestants use these snap setters and struggling away to close the handles, I assumed it would be really quite hard and take quite a lot of strength. However, in my poor weak, hyperemesis state, I found it really quite easy. I'm not sure what all their fuss was about!
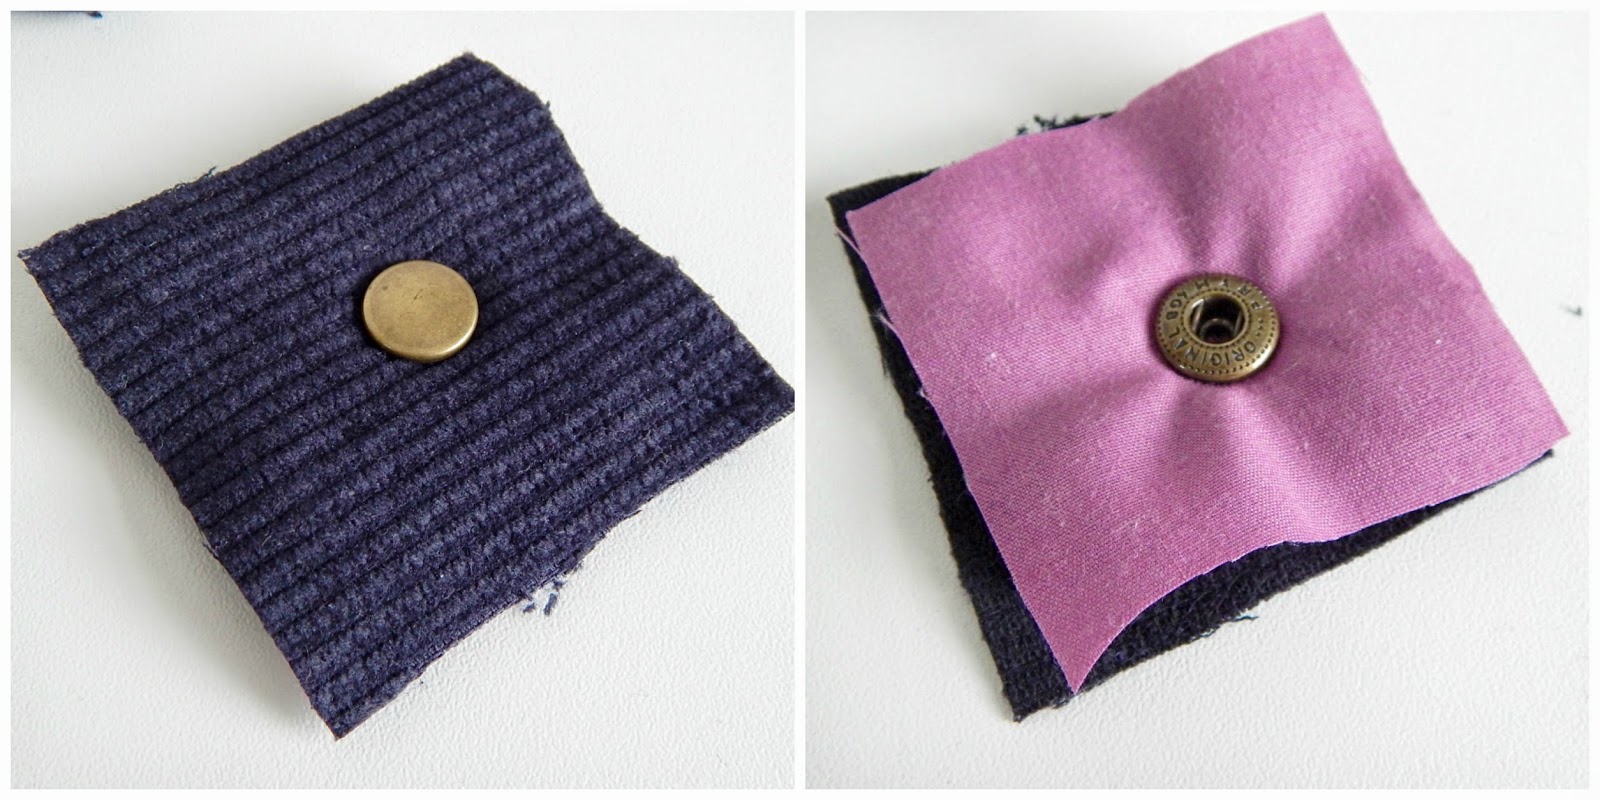
As you can see I did get some wrinkling on my lining fabric, but I suspect that's the extra bulk of the soft & stable coupled with the fact that none of my fabrics were joined together before using the snap.

Next I put the male snap part 'bits' into the setter and then put the rounded nobbly snap into place on the bottom.

I used my awl again with the back male snap part threaded on to line up this male snap. I lined up the point with the piece already in the tool and then slid the fabrics and snap part off the awl into place.

Once again a gentle press down until I felt the 'click' and the snap was securely in place.

As you can see, the fabric sits a lot smoother without the soft & stable but is still very secure. I look forwards to trying the setter on a real bag so that I can let you know if there's any lining wrinkling on that.
Overall, I was very impressed with the Prym Vario Poppa Plier snap setter from Minerva crafts and found it easy to use. I was impressed at how little strength was needed to set these snaps and will definitely be looking for more excuses to use snaps on my future bags! Thanks Minerva!
