
Hi everyone! It's Reece from Happy Okapi, back for the final day of the Companion Carpet Bag Sew Along. If you're just joining us, check out all the details, including a discount for the pattern, and the fabulous prizes up for grabs, all in this blog post on my page.
Here is the format of this sew along:
- Day 1 I like to do all the prep work, including fabric selection, gathering of supplies, cutting, and fusing/basting.
- Day 2 Here is where I prefer to get all the fussy work out of the way, like pockets, piping, and zippers if possible.
- Day 3 (That's today!) Final assembly!! We take all our pieces and put them together to make our gorgeous bags!! (The extra exclamation marks are because this is my favourite part, and I get soooo excited about it)
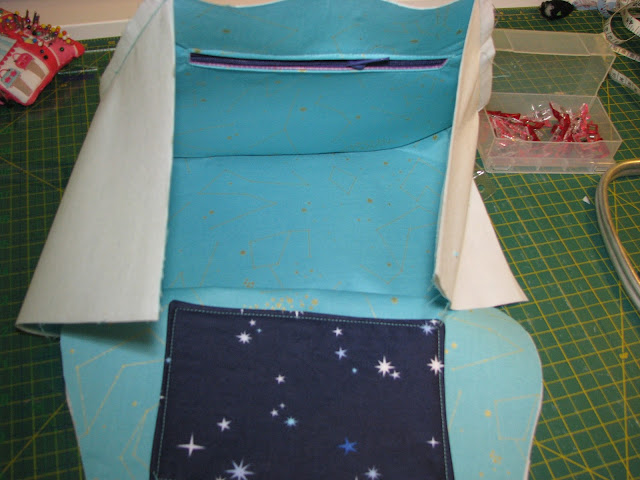
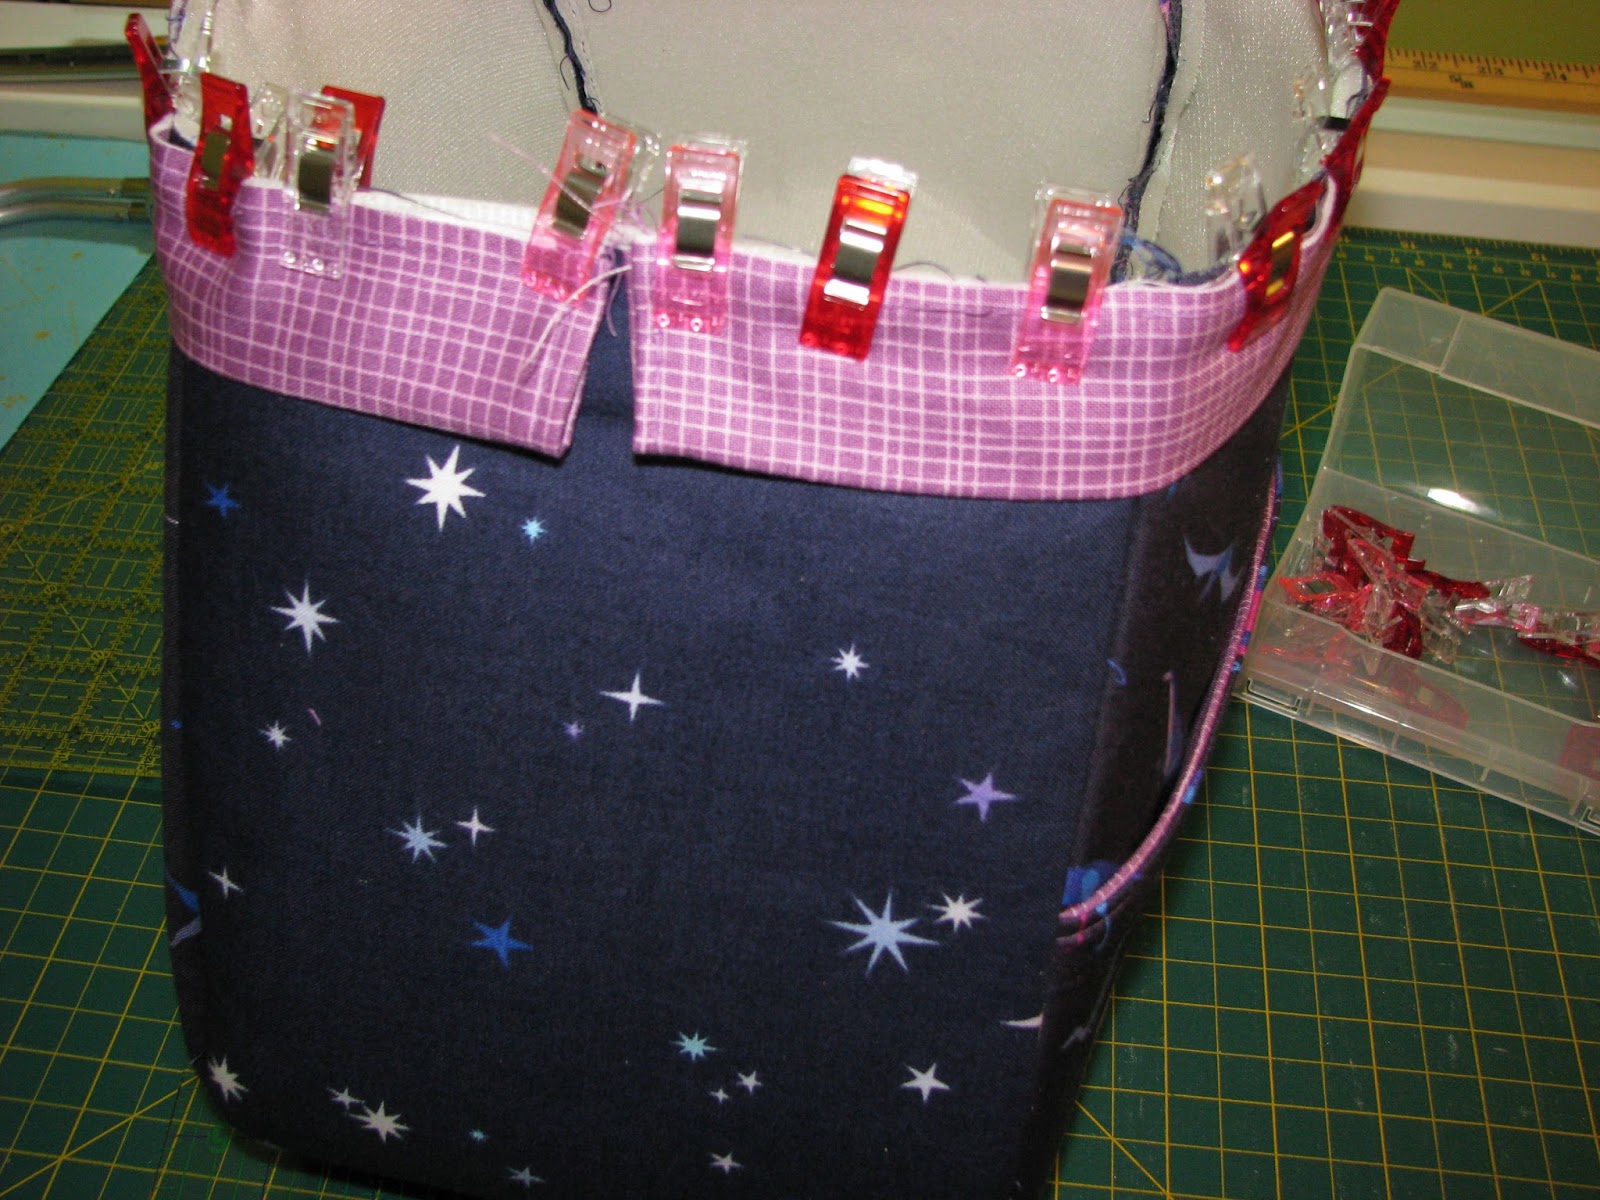
We left off at Day 2 with assembling the exterior bag and adding the purse feet. If you haven't already cut the frame channels, you can do that now after measuring the upper perimeter of the exterior of the bag. As the pattern indicates, for woven fabric, divide the perimeter by 2 and add 1/2" to find the length to cut for each frame channel. Turn and press a 1/4" hem on a short edge of a frame channel, turn and press 1/4" again, and stitch in place. Repeat for other short end of frame channel and both short ends of remaining channel. Now fold each frame channel in half, length wise, wrong sides together. If you're using a snap tab, refer to pattern to add it now.

Baste long edges of each frame channel together. Fold in half width-wise to find centre and mark or make a small notch. Match centre of one frame channel with centre of front of outer bag, then pin or clip in place, matching raw edges of frame channel with raw edge of top of bag.

Repeat with other frame channel and other half of bag outer. I've got my channels a bit close to each other, make sure you have about 1/2" gap between ends of frame channels. TRUST ME, you need to have the gap, otherwise putting the frame in is very difficult. Stitch in place with a scant 1/4" seam allowance. I use my free arm for this step and it goes quite quickly.

Attaching the handles
If you haven't already done so, attach your handles now. Refer to the pattern for positioning depending on the size of your bag and type of handle. I also find it easier to open the bag on the end of my ironing board in order to mark my handle placement.

I like to add a bit of glue under the handle before I stitch in place, just for added securement, and then weigh it down with a heavy book while the glue dries.
Final assembly
Assemble lining panels and lining gusset, the same way you did the exterior on day 2, except this time, leaving a turning gap on one panel/gusset seam. I love Samantha's way in the pattern of leaving a turning hole, by backstitching before the turning hole, and then switching to a basting stitch for the distance of the turning hole, then going back to normal stitch length, and backstitching again and continuing on with remainder of sewing lining panel to gusset.
Now with frame channels pinned down to outer bag exterior, place bag outer into bag lining, right sides together.


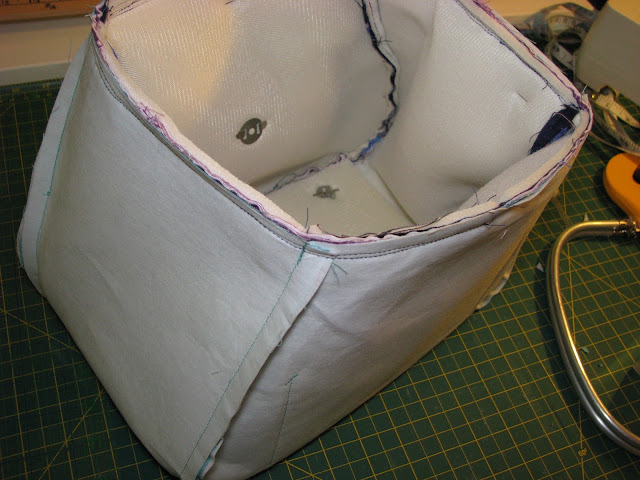
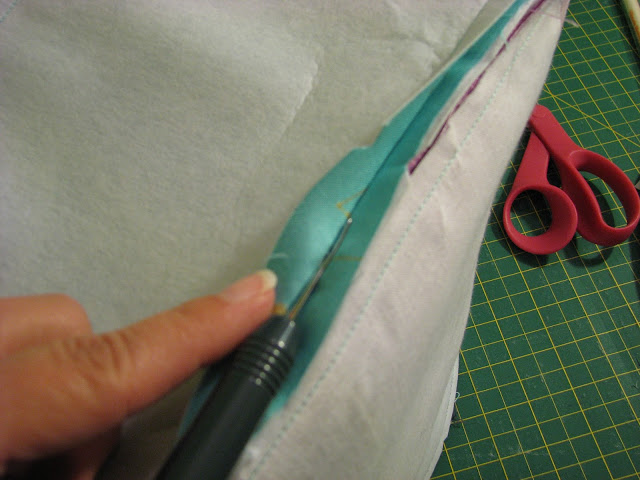
Trim down seam allowance if needed, especially in corner seams. Make sure to leave the seam allowance over the turning hole intact. Use a seam ripper to open up turning hole in lining.
Now for what I call "the moment of truth": turning the bag! Gently start turning the bag right side out through the turning hole, being careful not to poke yourself with the pins you used to keep the frame channels out of the way. Have a good look at your bag once it's turned right side out. You want to make sure you didn't miss any seams anywhere, this is your chance to go back over any parts that need to be redone before the turning hole is closed.


Once you've finished your bag, be sure to enter to win one of 3 fabulous prizes.
There are two ways to enter until the end of September:
Instagram - Share your photos, in progress and finished, and use the hashtag #CompanionCarpetBagSAL to enter. Simple, right?
But what if you don't use Instagram?
Contact pageThat's easy too! Just upload your photo to Happy Okapi's Contact page and I'll enter your bag for you.
Thank you so much for joining us for the Sew Along, I can't wait to see all the finished bags!

Baste long edges of each frame channel together. Fold in half width-wise to find centre and mark or make a small notch. Match centre of one frame channel with centre of front of outer bag, then pin or clip in place, matching raw edges of frame channel with raw edge of top of bag.

Repeat with other frame channel and other half of bag outer. I've got my channels a bit close to each other, make sure you have about 1/2" gap between ends of frame channels. TRUST ME, you need to have the gap, otherwise putting the frame in is very difficult. Stitch in place with a scant 1/4" seam allowance. I use my free arm for this step and it goes quite quickly.
If you haven't already done so, attach your handles now. Refer to the pattern for positioning depending on the size of your bag and type of handle. I also find it easier to open the bag on the end of my ironing board in order to mark my handle placement.

I like to add a bit of glue under the handle before I stitch in place, just for added securement, and then weigh it down with a heavy book while the glue dries.
Final assembly
Assemble lining panels and lining gusset, the same way you did the exterior on day 2, except this time, leaving a turning gap on one panel/gusset seam. I love Samantha's way in the pattern of leaving a turning hole, by backstitching before the turning hole, and then switching to a basting stitch for the distance of the turning hole, then going back to normal stitch length, and backstitching again and continuing on with remainder of sewing lining panel to gusset.

Now with frame channels pinned down to outer bag exterior, place bag outer into bag lining, right sides together.
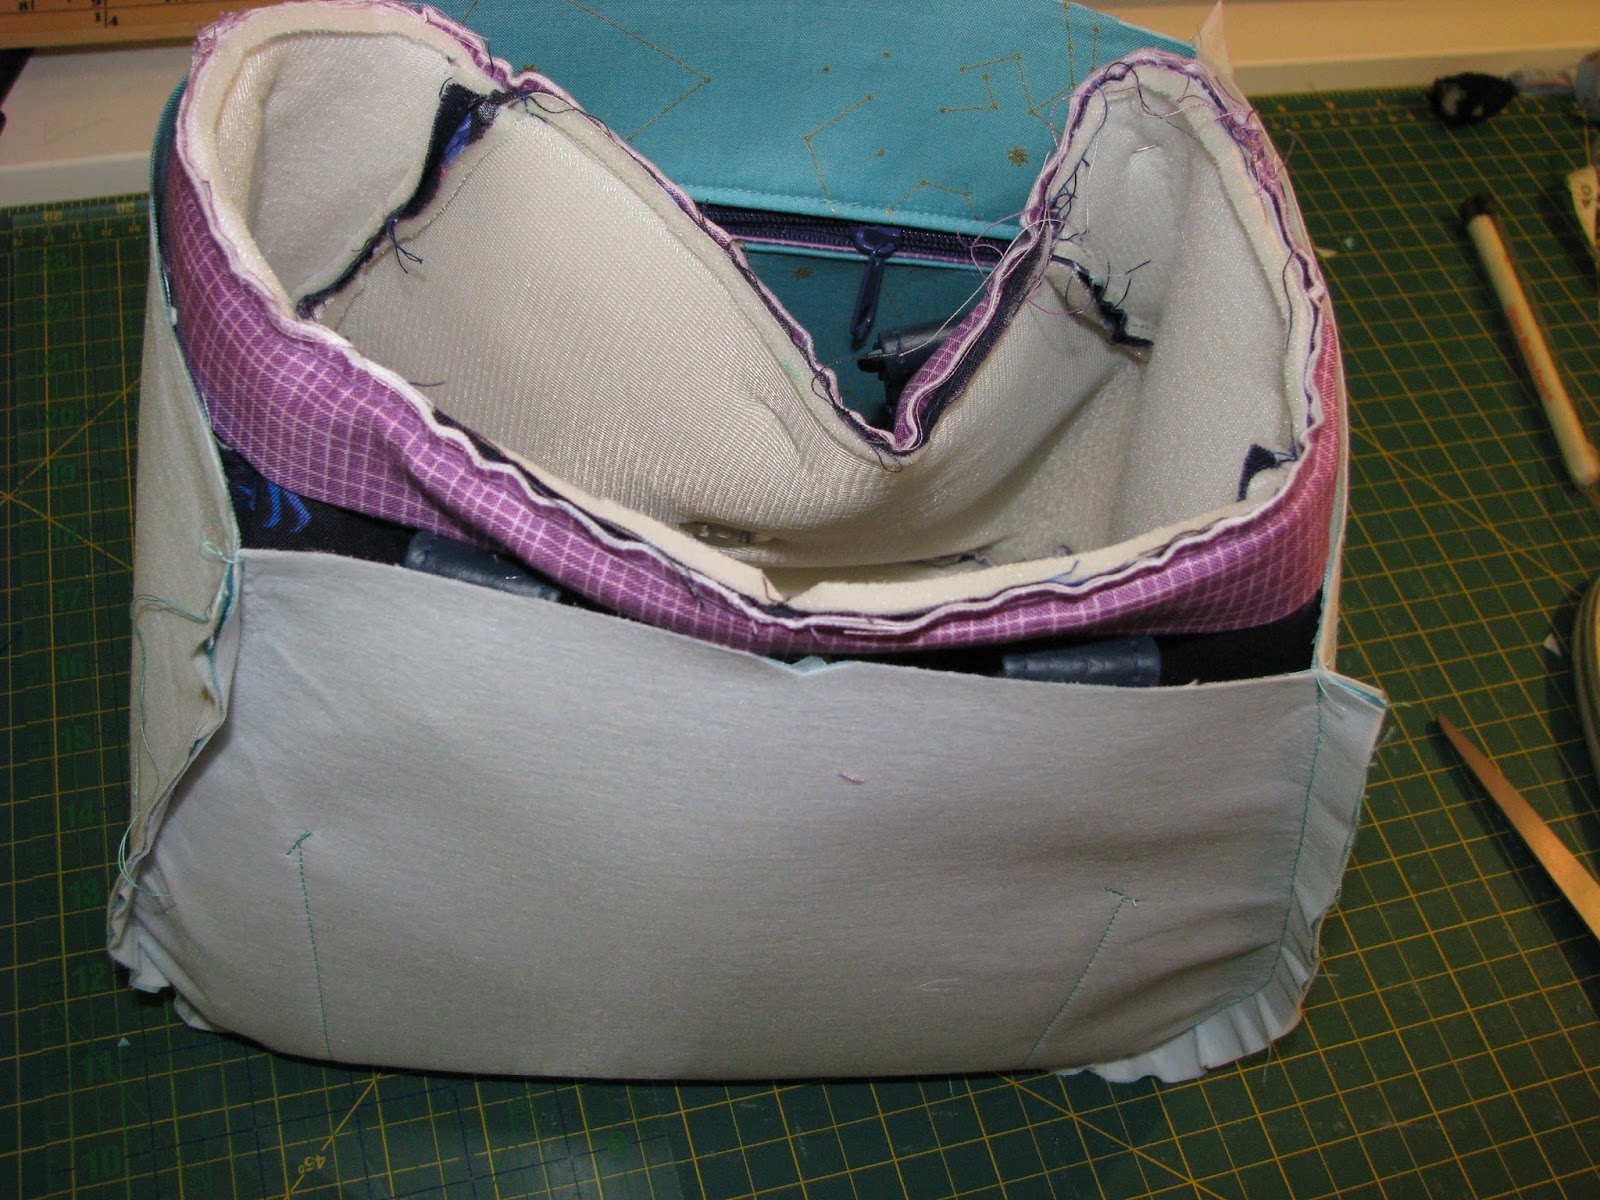
Match up seams and pin or clip in place along top edge. I use a clip on each side of a seam and front and back centres, then move my way in and use lots of pins or clips.

Stitch in place with 3/8" seam allowance (this is probably my favourite step of any bag I make).

Trim down seam allowance if needed, especially in corner seams. Make sure to leave the seam allowance over the turning hole intact. Use a seam ripper to open up turning hole in lining.

Now for what I call "the moment of truth": turning the bag! Gently start turning the bag right side out through the turning hole, being careful not to poke yourself with the pins you used to keep the frame channels out of the way. Have a good look at your bag once it's turned right side out. You want to make sure you didn't miss any seams anywhere, this is your chance to go back over any parts that need to be redone before the turning hole is closed.

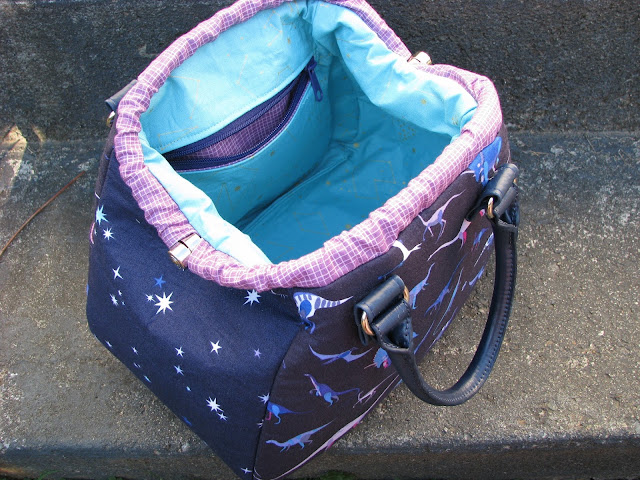
Press the seam allowances over the turning hole in toward the wrong side and stitch your turning hole closed either by hand, or by machine with thread matching your lining and a tiny seam allowance (this is the option I always choose). Tuck the lining bag into the outer bag. Almost done!

The last step is to insert the frame! It can be intimidating if you've never done it, but it's easy, trust me. I even made a quick video showing you how. You can find my video over at my blog, here. Once your frame is in, give your bag a final press, and it's done!!! Yay, we did it!

Once you've finished your bag, be sure to enter to win one of 3 fabulous prizes.
There are two ways to enter until the end of September:
Instagram - Share your photos, in progress and finished, and use the hashtag #CompanionCarpetBagSAL to enter. Simple, right?
But what if you don't use Instagram?
Contact pageThat's easy too! Just upload your photo to Happy Okapi's Contact page and I'll enter your bag for you.
Thank you so much for joining us for the Sew Along, I can't wait to see all the finished bags!
